|
Standard Origami Rose Diagrams (an easy simplified variation of the Kawasaki rose) Same as Bloom4ever
|
||
|
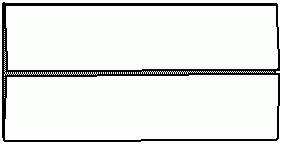
1. Start with a square piece of paper.
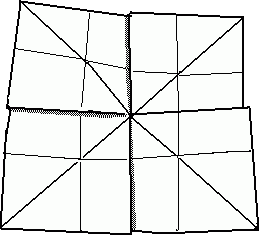
Fold it in half diagonally and horizontally in all directions. |
 | |
|
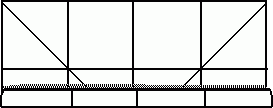
2. Fold the top and bottom of the paper into the center making a "tissue"
Repeat this step on the other side to make a 4X4 grid. |
|
|
| 4 x 4 grid |  | |
|
3. Fold horizontally in half. Fold the lower row (the "closed" end) upward about 1/3(of the quadrents). Repeat this step on the other side. Make sure this is a Firm crease. |
 | |
|
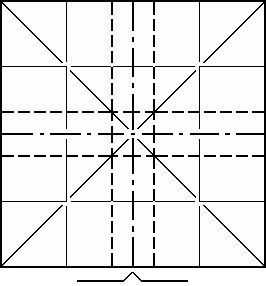
4. Open your paper.
The creases should now look like this. (white side up) Reinforce the creases you just made. All 4 valley folds must very be firm.
|
 | |
|
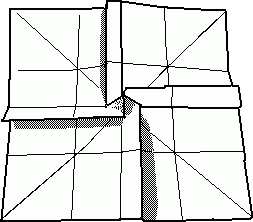
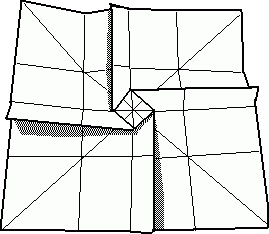
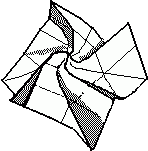
Pinch the other center mountain lines and make two more flaps(white side up). Rotate them the same direction as the previous two. Work with your paper until your model can lay flat. (the first time you do this may be a bit difficult)
(Make sure the center is popping out.) Note: These diagrams show the right handed, counter-clockwise spiral direction. |
 | |
|
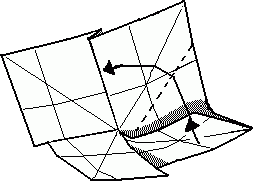
6. Slightly push in the tip of the center spike and carefully pull two opposite sides of the form to shape a square. Flatten the square. (the square does not have to be perfect)(white side up) |
 | |
|
7. Flip your paper over. It should look like this. (colored side up) |
 | |
|
8. Take one flap, and (in the same direction you "spiraled" the paper earlier) bend it so that its top is even with the side of the flap next to it.
Once they are even, fold. (also fold the underside) Let go of the flap and repeat this on all sides. (colored side up) Make sure to keep the edges of the paper down as you fold. |
 | |
|
Another view of the fold: The flap's top is now even with the side of the flap above it and ready to fold.
When the edges try to curve up as you move the paper-- push them back down. |
 | |
|
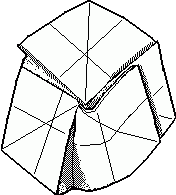
9. Make sure the four corners of the paper are down the bottom folds you just made are correct. Your model should look more or less like an open spiral.
|
 | |
|
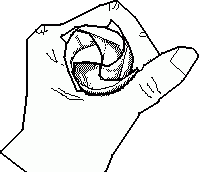
10. Grab all four corners and carefully push them until you can hold the rose in your hand. (Turning the model upside may help a little).
(this may take some time and poking the first time)
Basically, in this step you collapse the rose along the previous folds. |
 | |
|
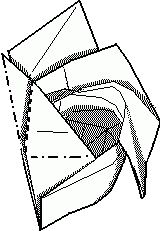
11. Push the triangular part (under the corner flap) down into the model. The folded corner should rest on top of the next triangle, allowing you to easily push the next triangle in. (Image shows a rough view of the first mountain/valley folds placed) |
 |
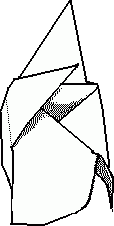
12. Continue folding the sides into the model. When you reach the last one, pinch the corner into a triangle and tuck it into the others. (Almost if you are closing a cardboard box.)
Note: Make sure you do this in the same direction that you spiraled everything else. (Alternately you can give up and use tape or glue to close the rose.) |
 |
|
13. Flip the rose over. Soften the inner swirl with a chopstick and curl the petals to make your rose beautiful.
|
 | |